Introduction:
Tinted car windows are great for privacy and blocking out harmful UV rays, but sometimes, they just have to go. Maybe your tint has faded over time, or you’ve received a legal warning about its darkness.
Whatever the reason, removing window tint at home can save you a chunk of cash compared to having a professional do it.
With the right tools and a bit of patience, you can do it yourself! Let’s dive into the different methods you can use to remove car window tints at home.
Why Remove Car Window Tint?
You might be wondering why anyone would remove tint from their car windows. Well, there are several reasons.
One of the most common is legal regulations. Certain states have strict laws regarding the level of tint allowed on vehicle windows, and if your tint is too dark, you may face fines or be asked to remove it.
Another reason is purely aesthetic. Over time, tint can bubble, fade, or become scratched, making your car look old and worn out. In such cases, removing the tint can give your car a fresh, clean look.
Sometimes, it’s just personal preference – maybe you want more natural light inside your vehicle or a clearer view.
Read More: What is Purge Valve? Symptoms of Bad Canister Purge Valve
Common Methods to Remove Window Tint
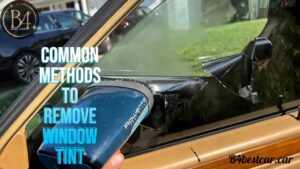
There are three main methods to remove window tint: the heat method, the ammonia method, and the soap and scrape method. Each method has its pros and cons, but all can be done at home with some basic supplies.
Read More: Crankshaft Position Sensor: All You Need To Know 2024
Safety Precautions Before Start To Remove Tint

Before you start, it’s important to take some safety precautions. Tint removal often involves sharp tools and, in some methods, chemicals.
You should wear gloves to protect your hands, safety goggles for your eyes, and a mask if you’re working with ammonia or other strong chemicals.
Make sure you’re working in a well-ventilated area, especially if you’re using ammonia or other chemicals. Also, be gentle to avoid scratching your windows, particularly if they have defroster lines.
Read More: Hood Scoop For Car: Enhancing Performance and Aesthetics
Materials and Tools You’ll Need
Here’s a quick list of the materials you’ll need to remove window tint:
- Heat gun or hairdryer
- Ammonia or soapy water
- Razor blade or plastic scraper
- Microfiber cloths
- Glass cleaner
- Adhesive remover or rubbing alcohol (for sticky residue)
Read More: Nuna Car Seat: Safety and Comfort for Your Little One
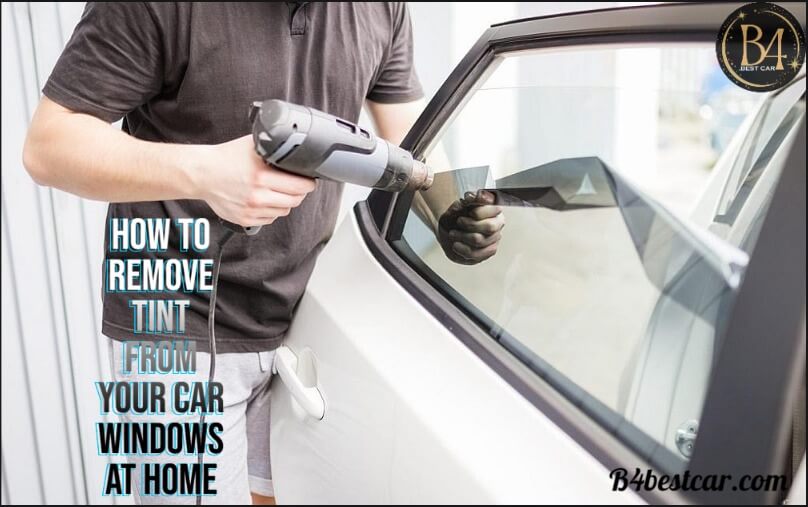
Method 1: Heat Method for Tint Removal
The heat method is one of the most effective and popular ways to remove tint.
Step 1: Preparing the Car
Park your car in a well-ventilated area and make sure the windows are clean. This will make it easier to spot any areas where the tint is being stubborn.
Step 2: Applying Heat to Loosen the Tint
Using a heat gun or a hairdryer on a high heat setting, start from one corner of the window and heat the tint. Move the heat source evenly across the window until the tint becomes soft and pliable.
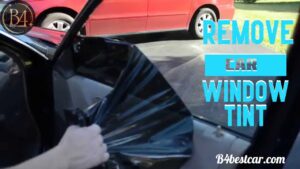
Step 3: Peeling Off the Tint
Once the tint is heated, grab a corner with your fingernail or a plastic scraper and gently begin peeling it away from the window. The goal is to remove the tint in large pieces to avoid leaving bits behind.
Step 4: Cleaning the Adhesive Residue
After removing the tint, you’re likely to have some adhesive left on the glass. Use an adhesive remover or rubbing alcohol to dissolve the residue, then wipe the window clean with a microfiber cloth.
Read More: What is a Wheel Lock? How Do They Work?
Method 2: Ammonia and Sunlight Method
This method involves using ammonia to break down the adhesive in the tint.
Step 1: Preparing the Ammonia Solution
Mix ammonia with water in a spray bottle. Make sure you’re working in a well-ventilated area to avoid inhaling fumes.
Step 2: Covering the Windows with Plastic
Spray the ammonia solution onto the tint and cover it with a plastic garbage bag or cling wrap. This will help trap the fumes and accelerate the breakdown of the adhesive.
Step 3: Letting It Sit in the Sun
Leave the windows covered for about an hour, preferably in direct sunlight, to help the ammonia penetrate the tint.
Step 4: Removing the Tint and Cleaning Up
Peel off the plastic and begin removing the tint in large sections. Follow up with a thorough cleaning to remove any leftover adhesive.
Read More: Best Used Cars to Buy in 2024
Method 3: Soap and Scrape Method
This method is simpler and doesn’t involve chemicals but can be more labor-intensive.
Step 1: Preparing Soapy Water
Mix warm water with dish soap in a spray bottle. Spray the solution generously over the tinted windows.
Step 2: Loosening the Tint with Moisture
Allow the soapy water to sit on the tint for a few minutes to soften the adhesive.
Step 3: Scraping Off the Tint Carefully
Using a plastic scraper or razor blade, start scraping off the tint. Make sure to keep the blade at a low angle to avoid scratching the glass.
Step 4: Removing Adhesive and Cleaning
Once the tint is removed, clean the windows with soapy water and finish off with glass cleaner to ensure no streaks are left behind.
Read More: How to Clean Your Steering Wheel: A Comprehensive Guide 2024
Step-by-Step Guide for Adhesive Removal
No matter which method you choose, you’ll likely be left with some sticky residue. Use an adhesive remover or rubbing alcohol to tackle it. Apply the remover to the affected areas, let it sit for a few minutes, and then wipe it off with a microfiber cloth. This should leave your windows sparkling clean.
Read More: 1st Fastest Car in the World: A Journey Through Speed
What to Avoid When Removing Tint
Be careful not to use sharp blades on windows with defroster lines, as you could permanently damage them. Also, avoid forcing the tint off if it isn’t coming easily – this could result in tears that are difficult to remove.
Read More : Fapegram: The Ideal Platform for Content Creators
Dealing with Stubborn Tint or Residue
If the tint or adhesive isn’t coming off easily, don’t panic. Reapply heat or the ammonia solution and try again. Stubborn spots may take a little extra time and effort, but patience is key.
Read More: 2024 Honda Prologue Review, Pricing, and Specs
Post-Removal Care for Car Windows
After you’ve successfully removed the tint, make sure to clean your windows thoroughly. Inspect the glass for any scratches or damage. If everything looks good, give your windows a final polish with glass cleaner to ensure a clear and streak-free finish.
Read More: Mazda RX 7 FC Price, Specs, Design & Value
Advantages of DIY Tint Removal
One of the biggest advantages of removing tint at home is the cost savings. Professional tint removal can be expensive, but by doing it yourself, you only pay for materials. Plus, you gain a sense of accomplishment and hands-on learning.
Read More: 2024 Jeep Compass: A Compact SUV with Big Aspirations
Disadvantages of DIY Tint Removal
That said, there are some downsides to consider. Tint removal can be time-consuming and frustrating, especially if you’re dealing with stubborn adhesive. There’s also a small risk of damaging your windows if you’re not careful.
Read More: What Is Jeep Ducking?
Conclusion
Removing car window tints at home is a manageable task with the right tools and techniques. Whether you choose the heat method, ammonia method, or the soap and scrape method, each has its benefits and challenges.
By following the steps outlined here and taking safety precautions, you can get the job done without too much hassle. Just remember, patience and persistence are key!